Authentication
In this section of the documentation, we will show you how to integrate Authentication in the SaaSBold boilerplate.
Overview
The authentication setup in SaaSBold includes configuring NextAuth, integrating Google Auth and GitHub Auth, and enabling Magic Link authentication. This guide will provide detailed steps to set up each authentication method.
In this boilerplate, we are using NextAuth to manage the authentication. Let’s get started.
NextAuth Setup
First, let’s set up NextAuth.js. It’s a great tool for handling authentication because it supports multiple providers, making it ideal for your SaaS application.
Environment Variables
To get started, configure these two essential environment variables in the .env file:
NEXTAUTH_URL="YOUR_SITE_URL"
SECRET="A Random String"
To generate a random string, use this command:
openssl rand -base64 32Note
To generate a random string using this command, please make sure OpenSSL is installed
For development, the NEXTAUTH_URL is https://localhost:3000/, and for the live site, replace it with your live site’s URL (e.g., https://example.com/)
Note
If these variables are not set correctly, authentication will not work properly, and you will not be able to access the protected routes.
Now that NextAuth is configured properly, let’s integrate Google Auth. This is a convenient option for many users and simplifies the sign-up process.
Google Auth
To integrate Google Authentication, you must create a project on Google Console and obtain the Secret and Client Key.
Follow these steps to create a project on Google Console, after that get the Secret and Client ID.
Getting the Google Client ID and Secret
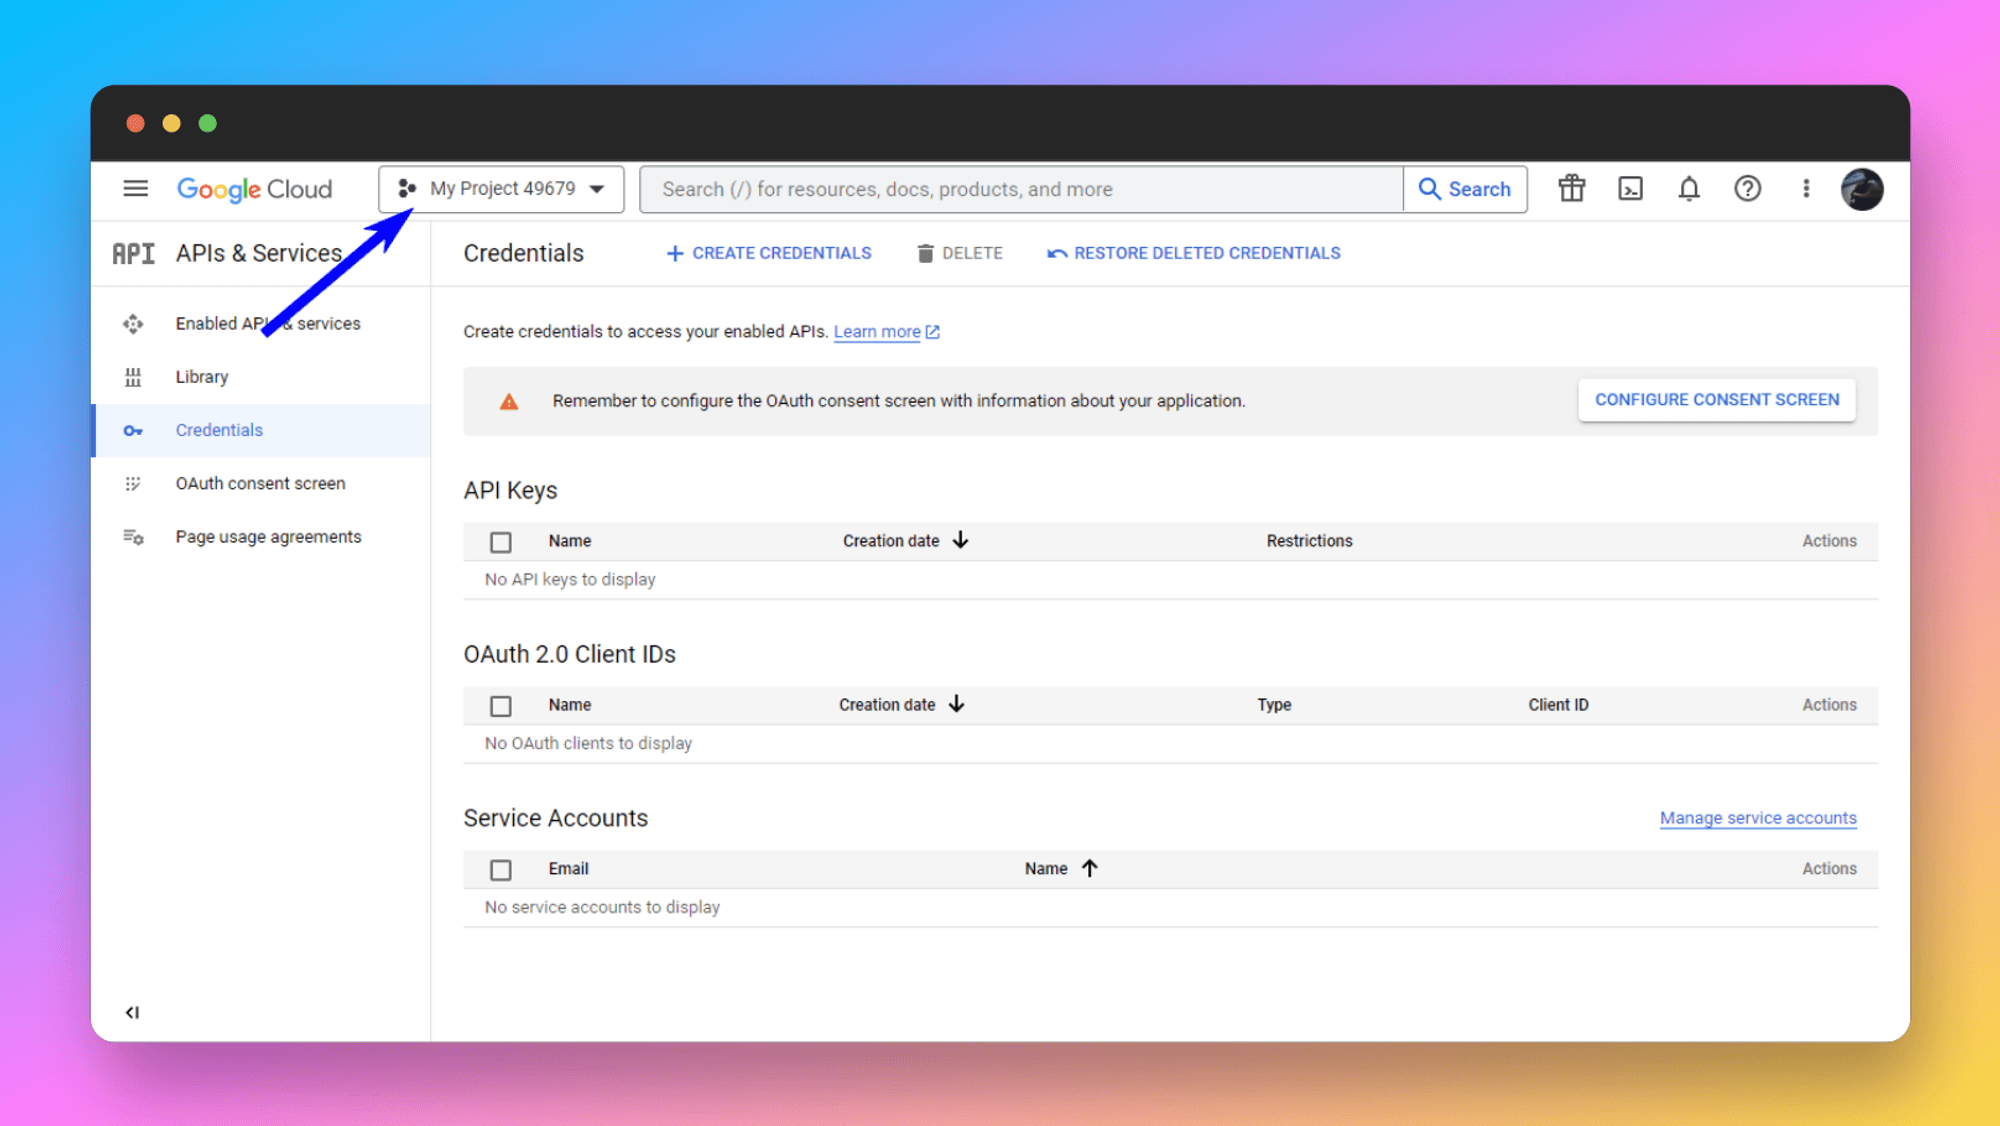
To get the Google Secret, go to Google Console . If you already have projects, you’ll see the CREATE CREDENTIALS button at the top. From there, you can generate the Secret and Client ID.
If you don’t have a project already, then create one.
- Go to the Projects tab. You’ll see all the projects listed.
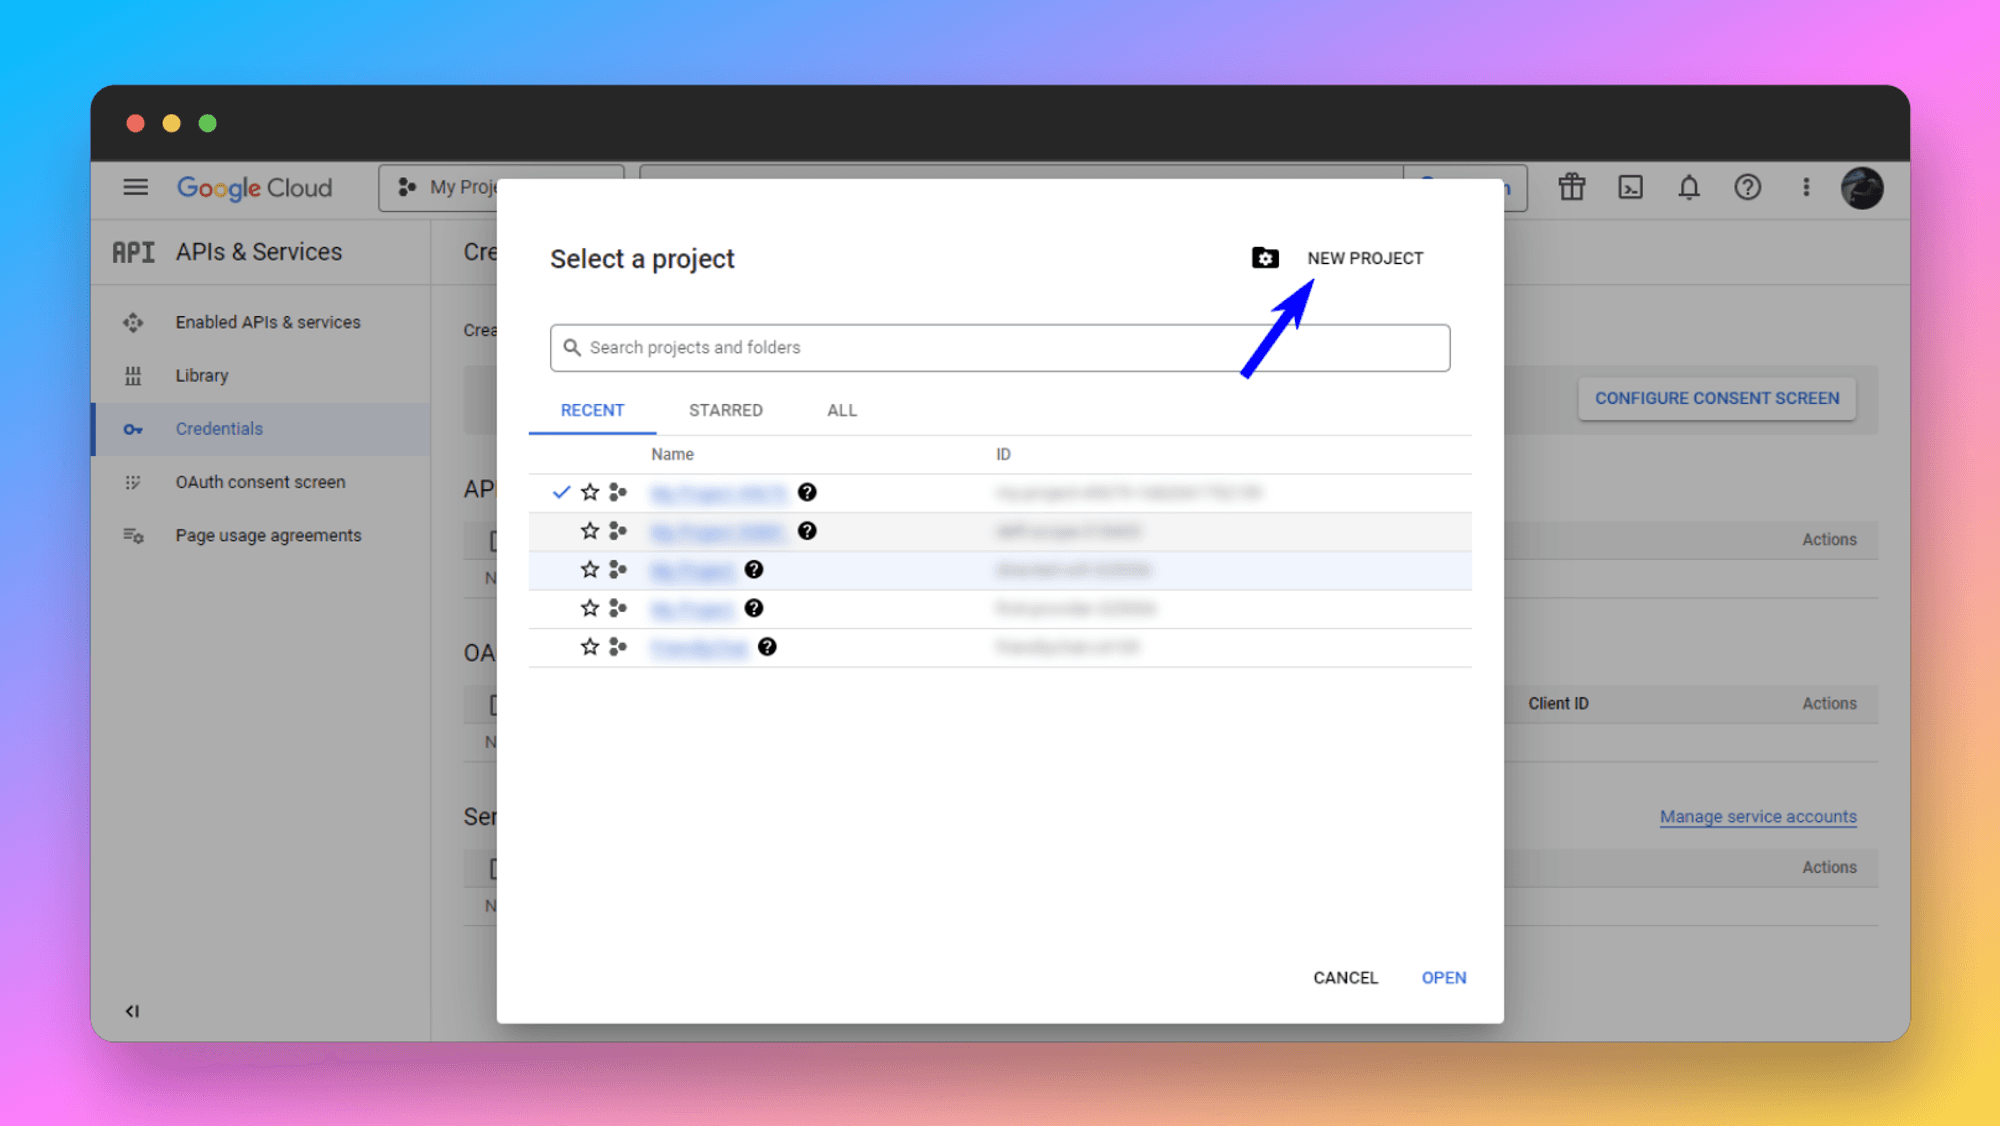
- Click on the New Project button below and follow the on-screen instructions to create your new project. Once you’ve created the project, make sure to select it.
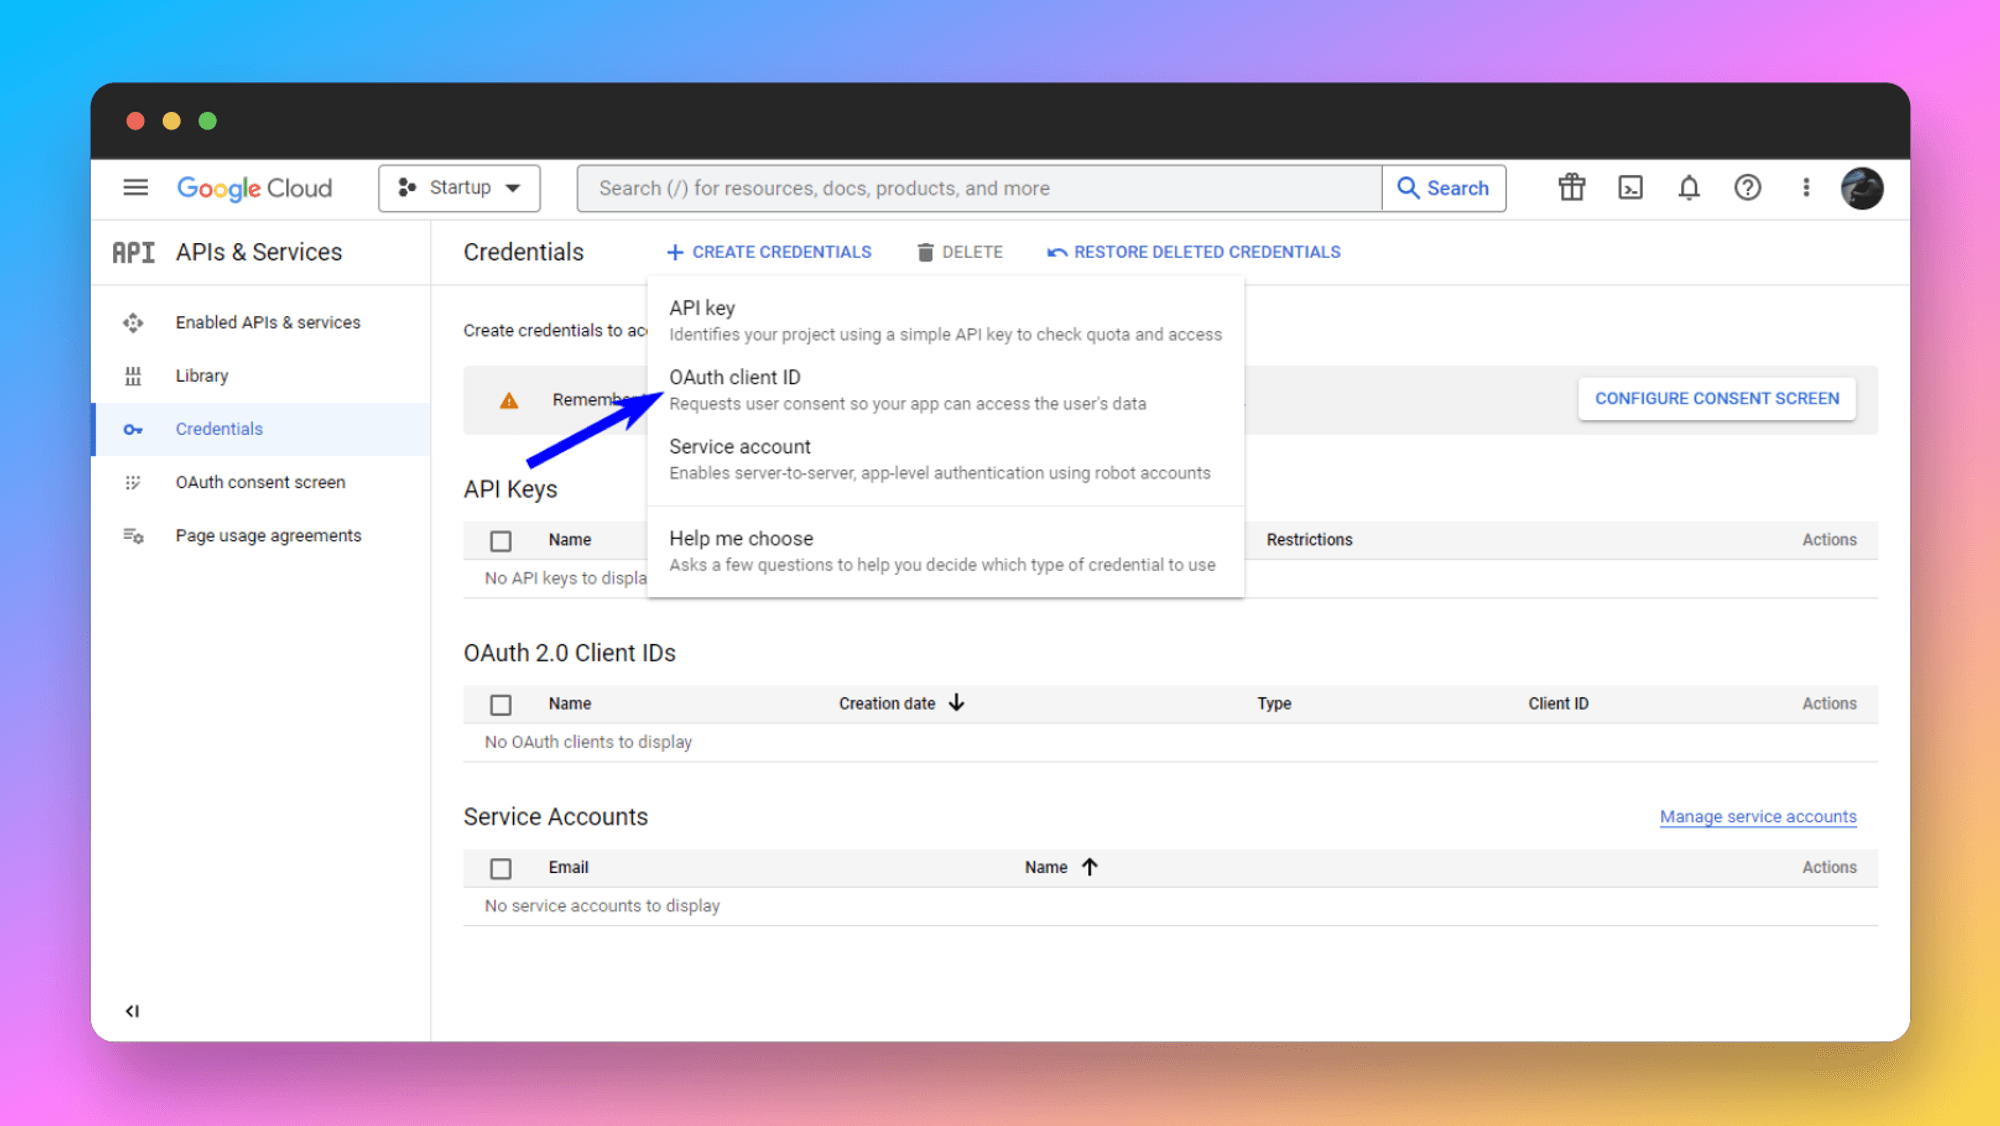
- Now, create the credentials by clicking the CREATE CREDENTIALS and then the 0Auth client ID.
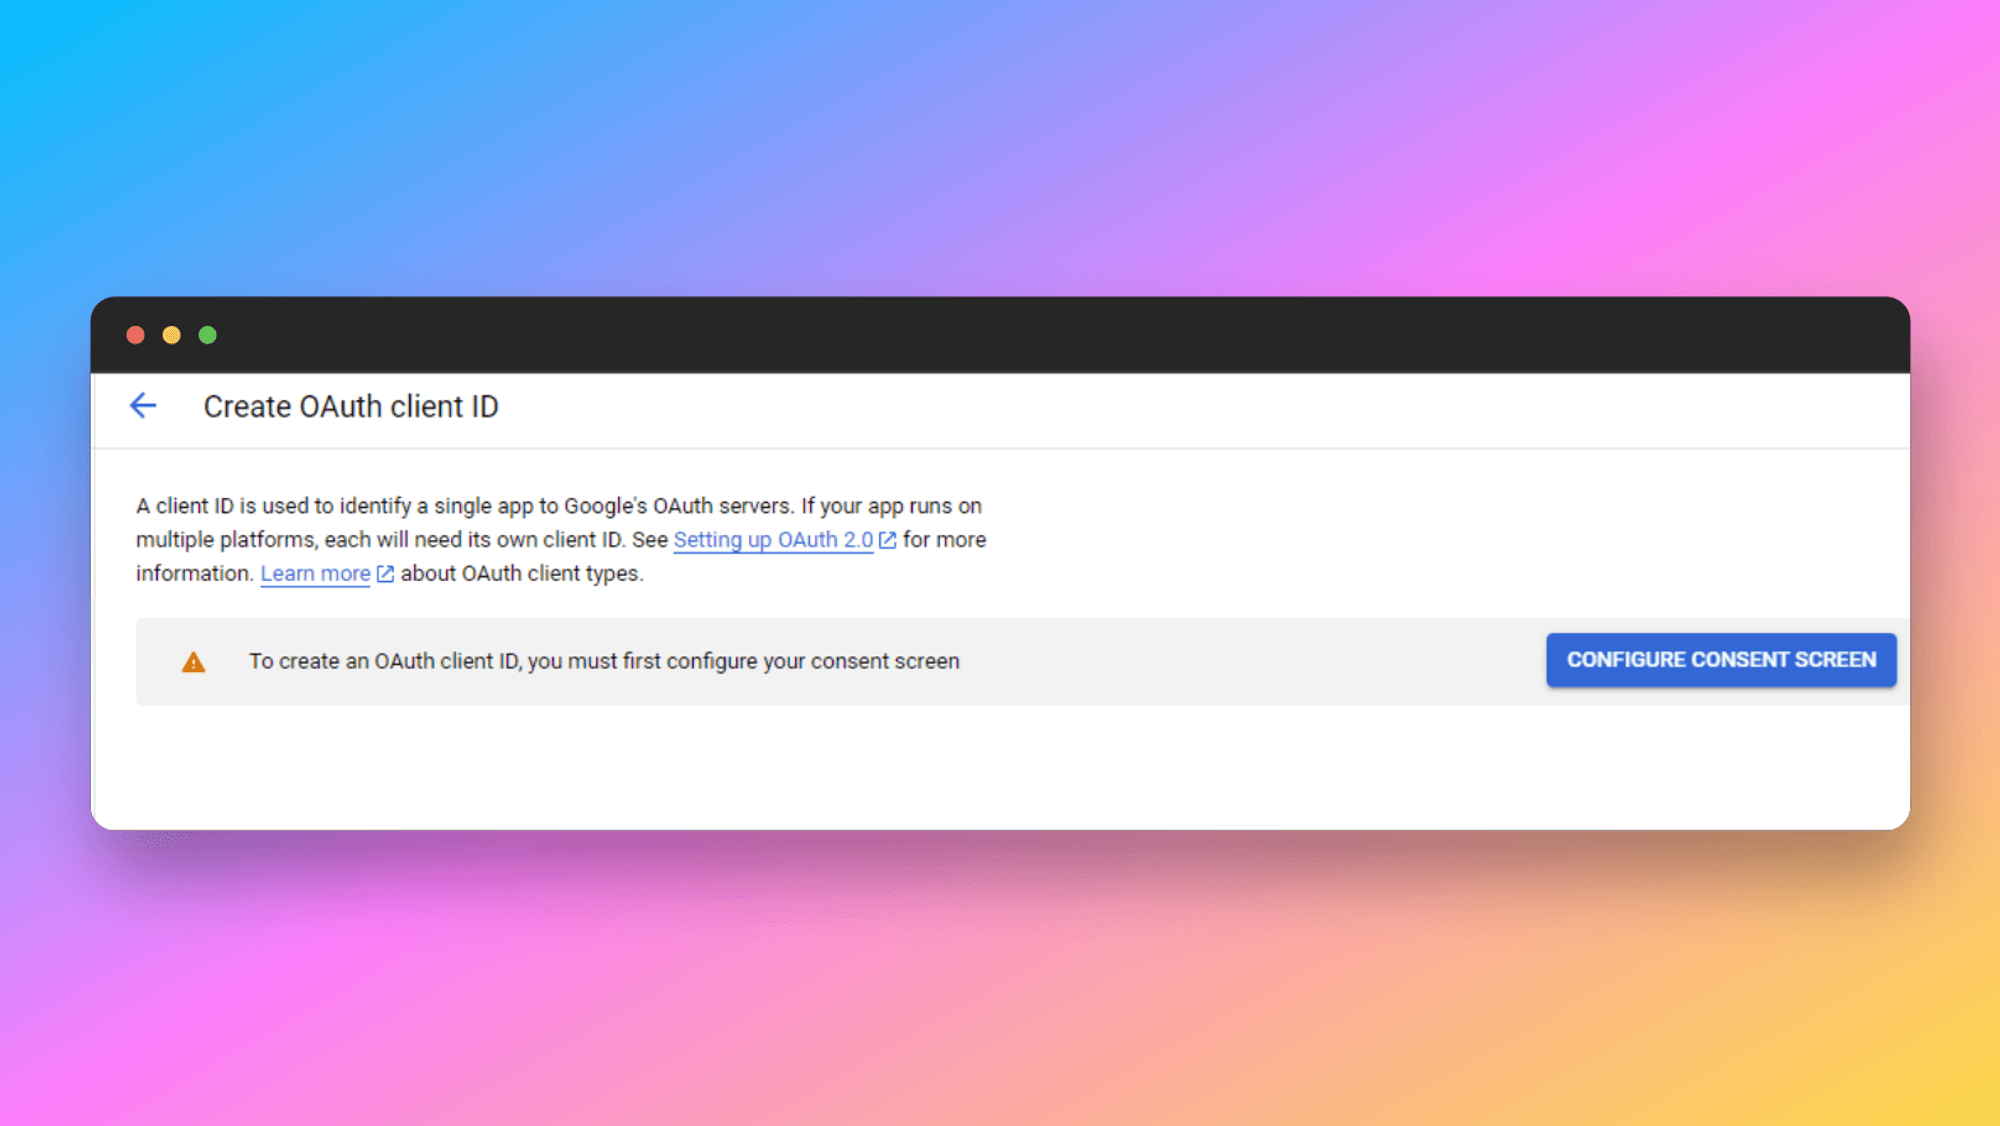
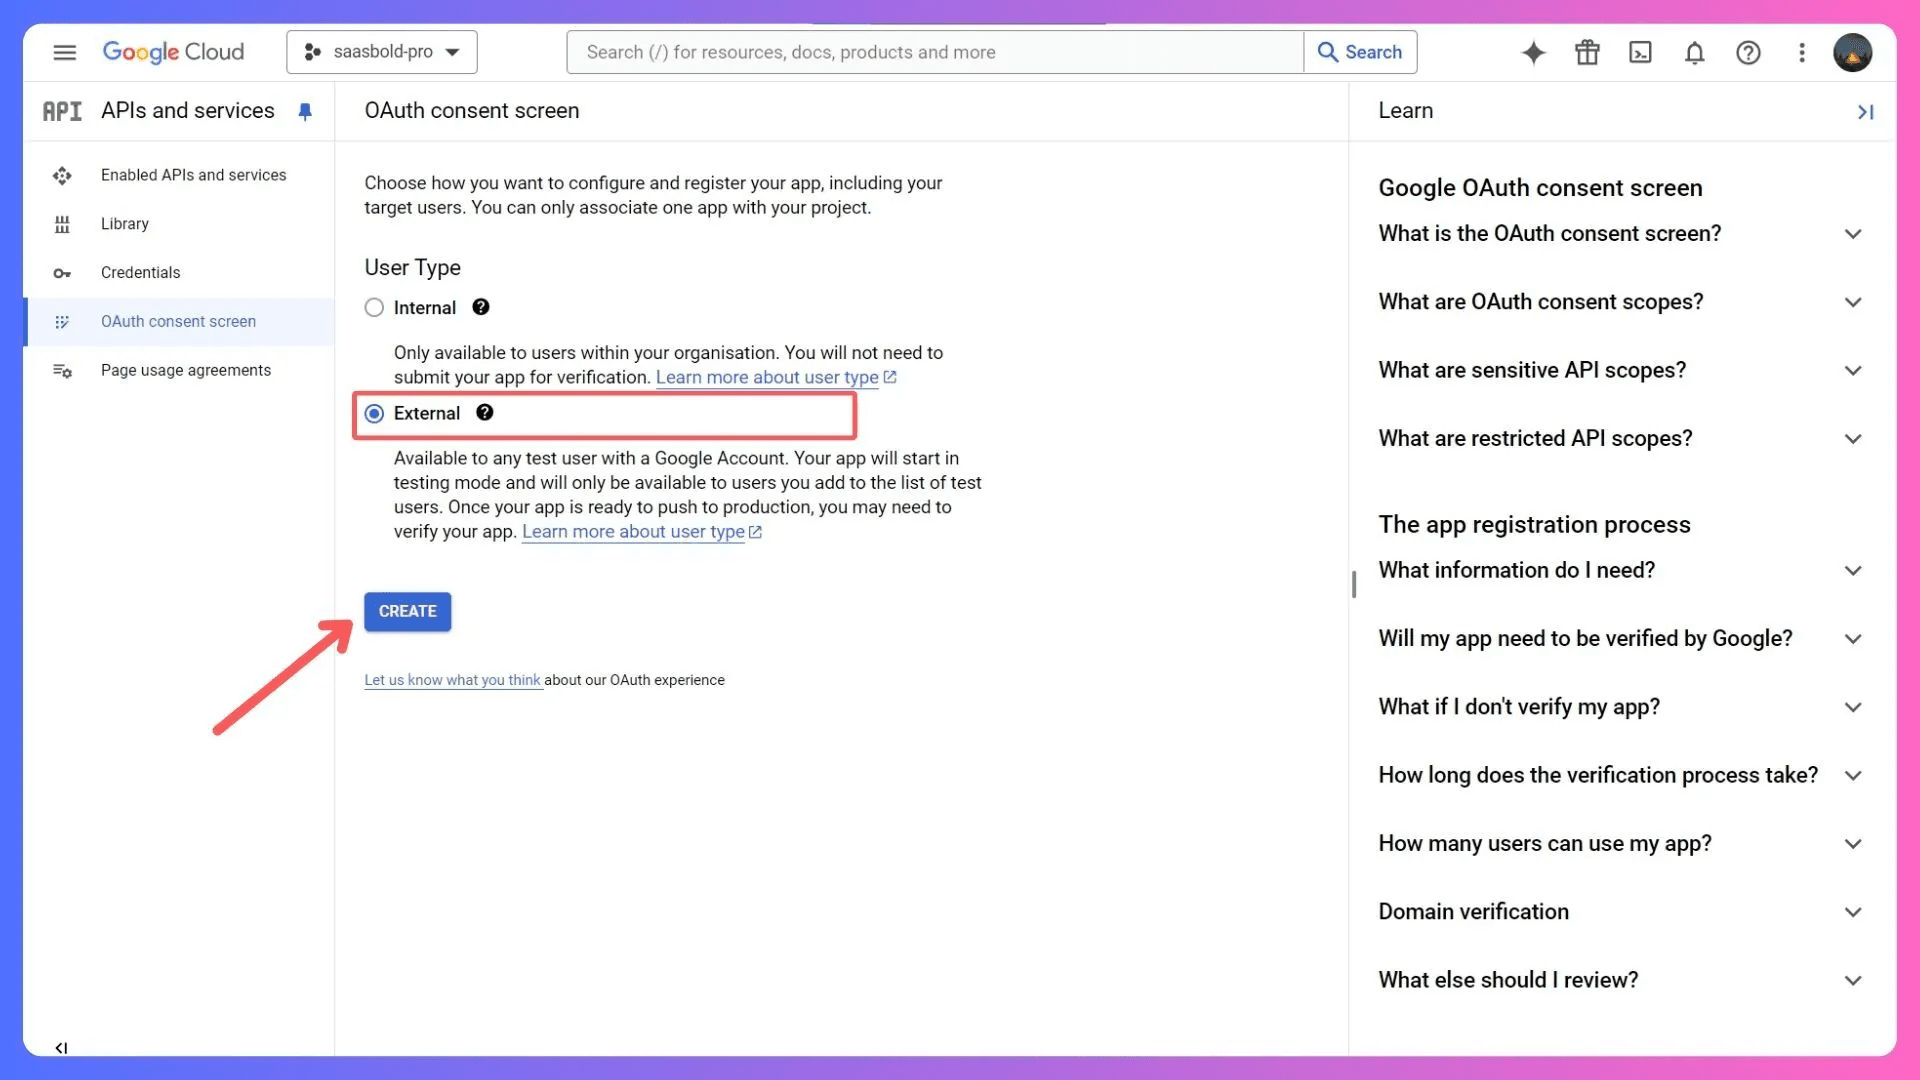
- Once you click on the 0Auth client ID, you might see something like this. If you see this, go ahead and configure the consent screen.
- OAuth Consent Screen: Choose “External” as the user type to indicate that your app will be used by users outside of your organization.
- Set Up OAuth Client: After completing the OAuth consent screen, click on “OAuth client ID” again and follow the instructions to set it up.
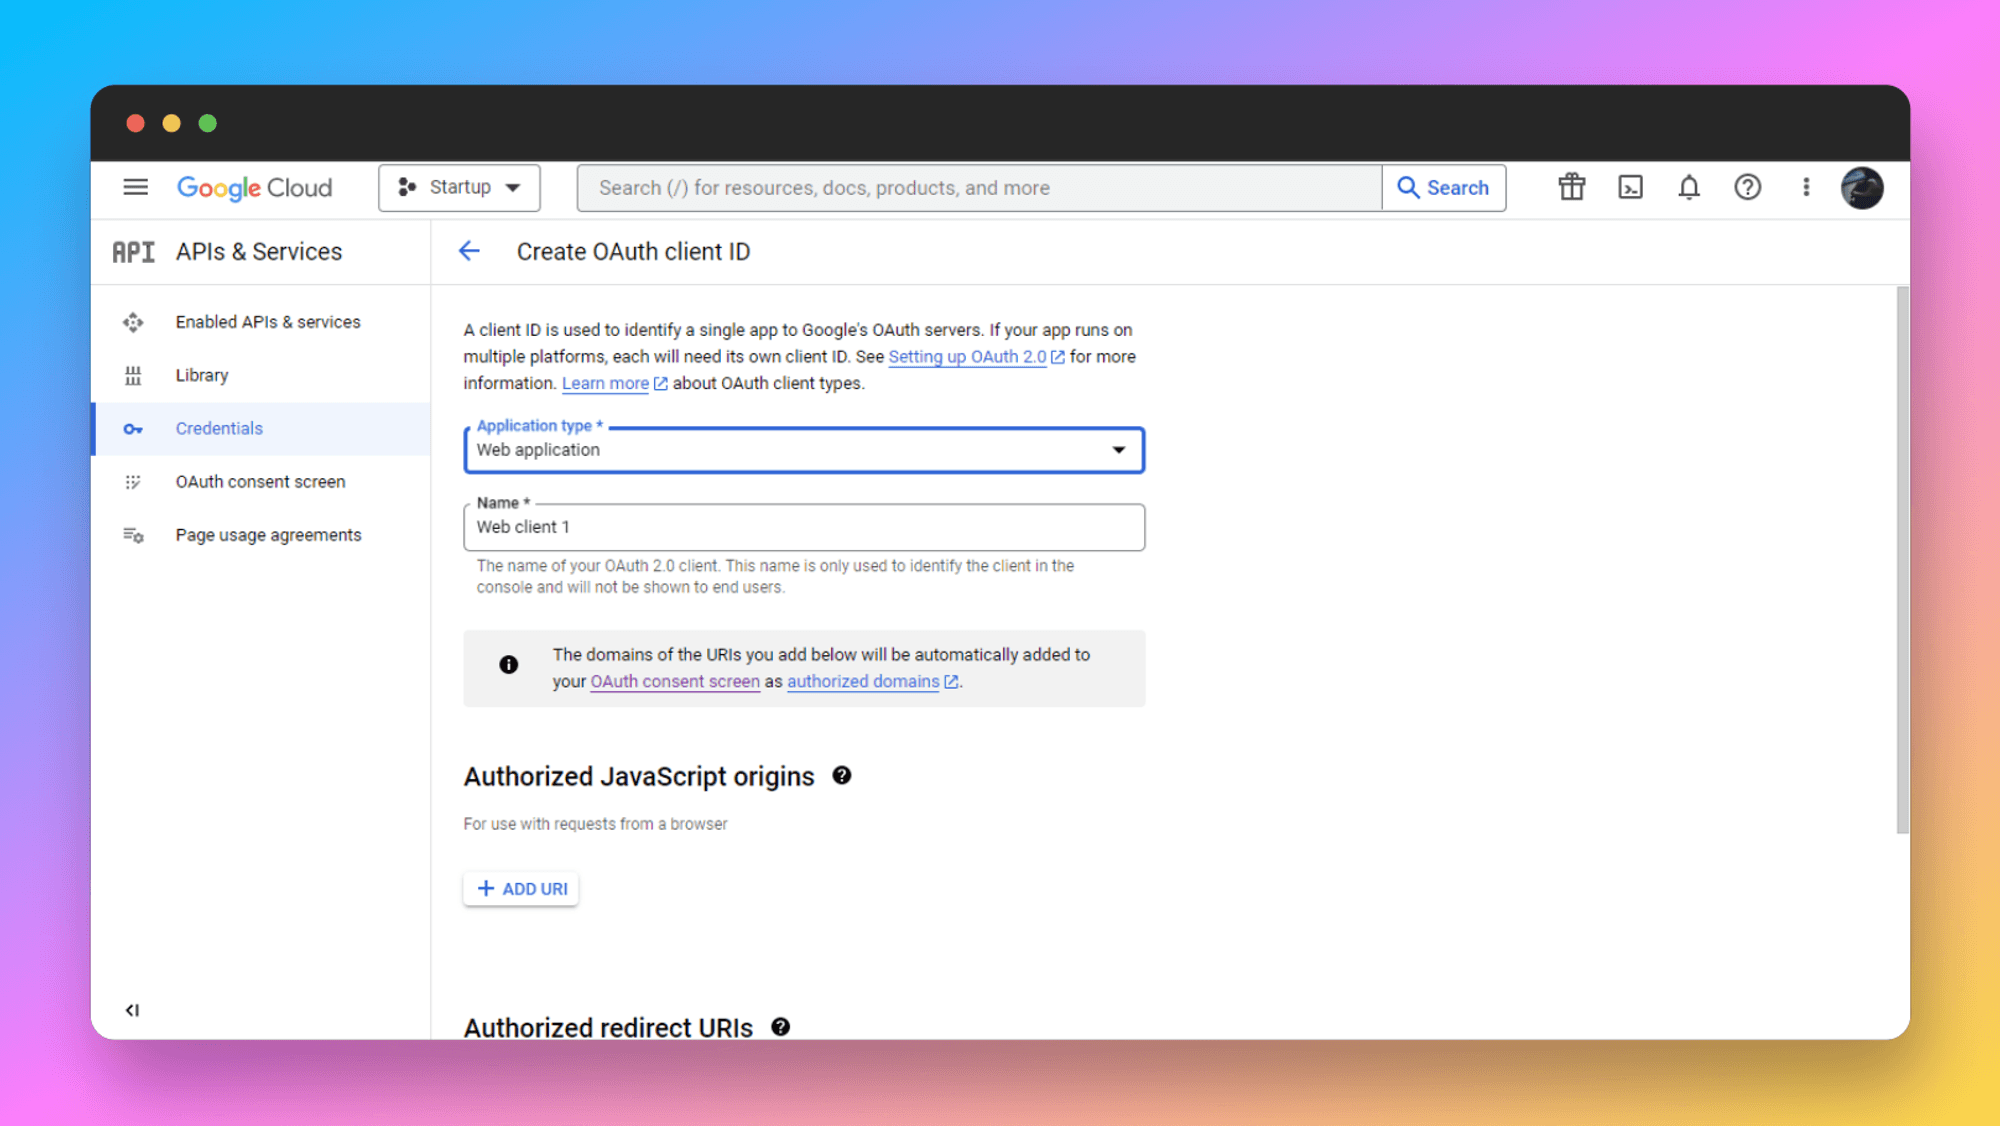
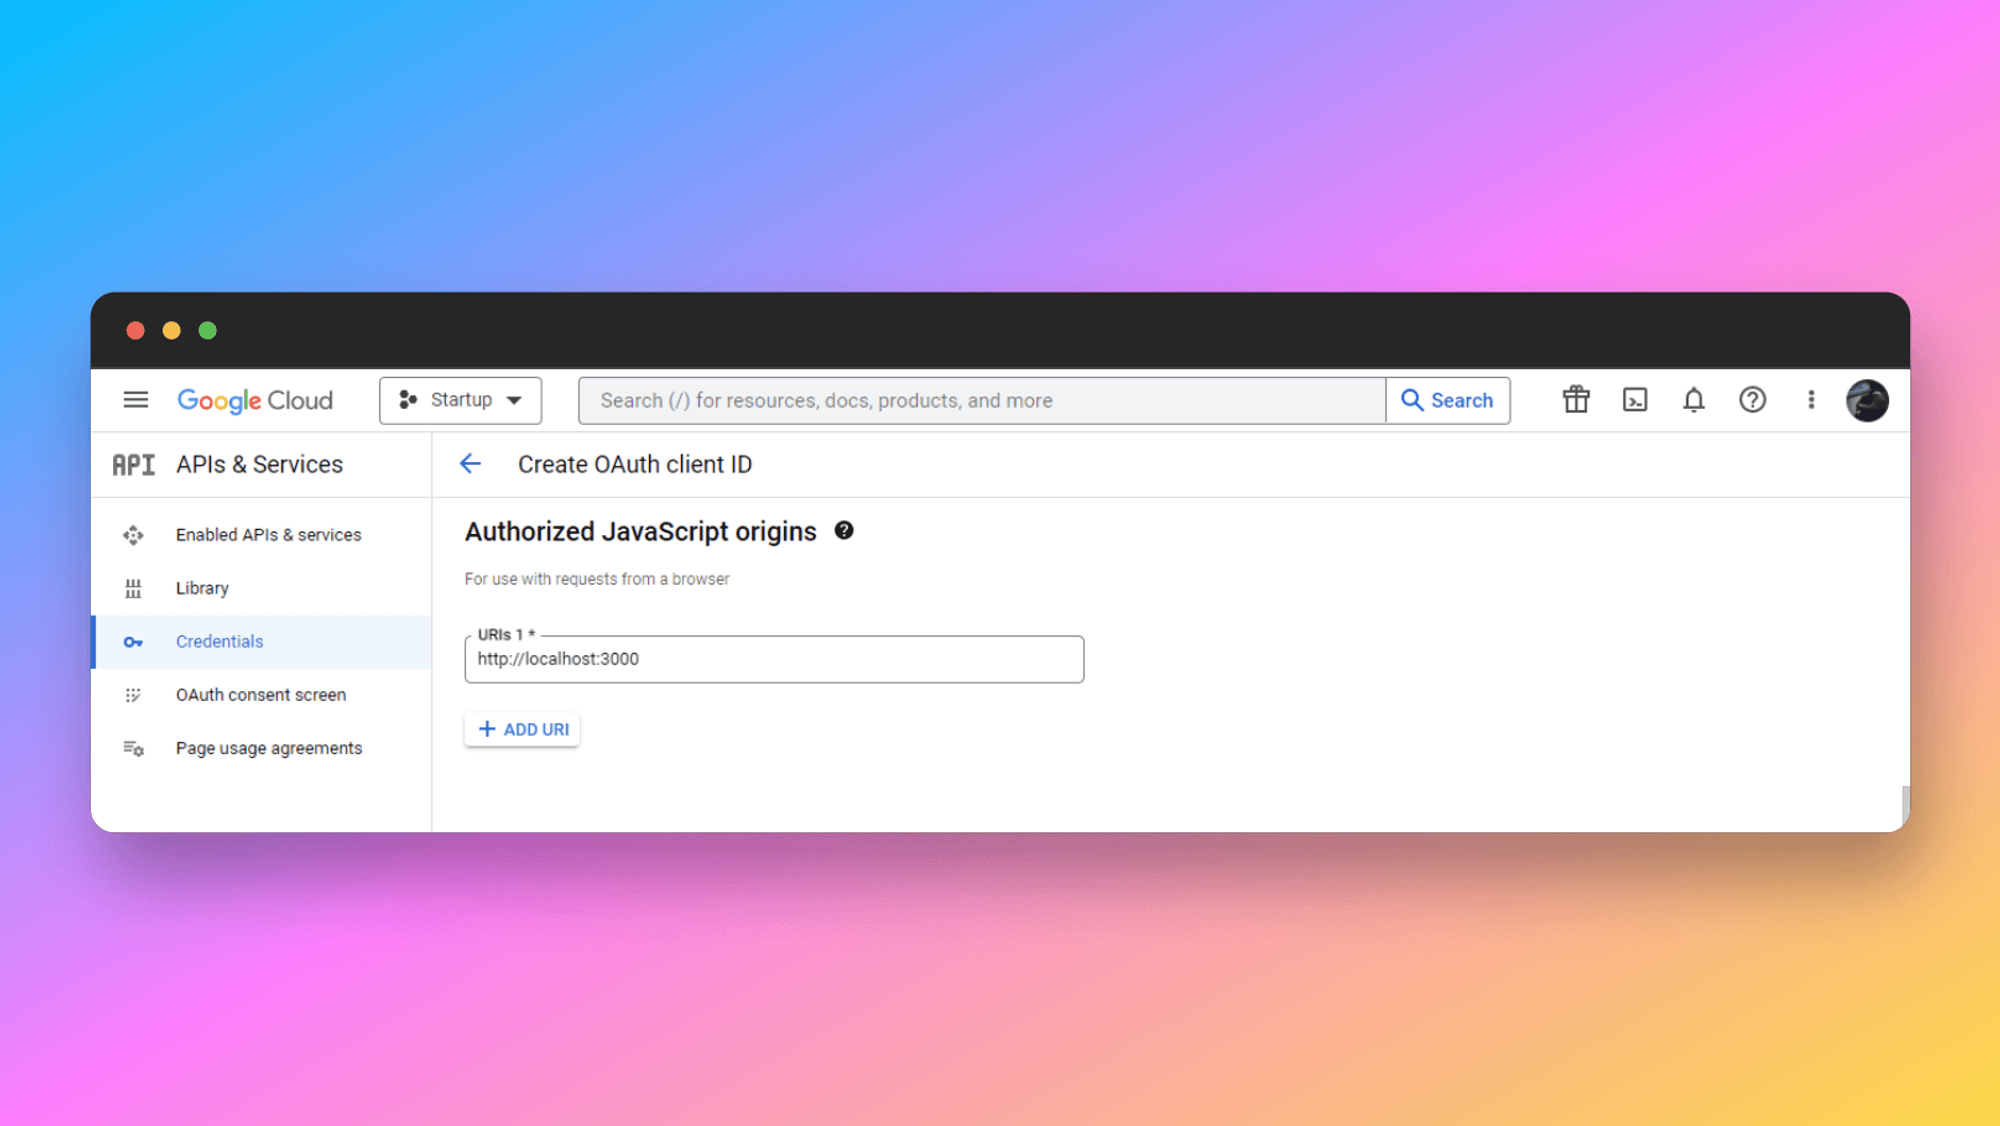
- Authorized JavaScript Origin: You’ll be asked to provide the Authorized JavaScript Origin. Click on the ADD URI button to add it.
Since we are setting up a local environment, we are going to add our localhost URL (
http://localhost:3000) there.
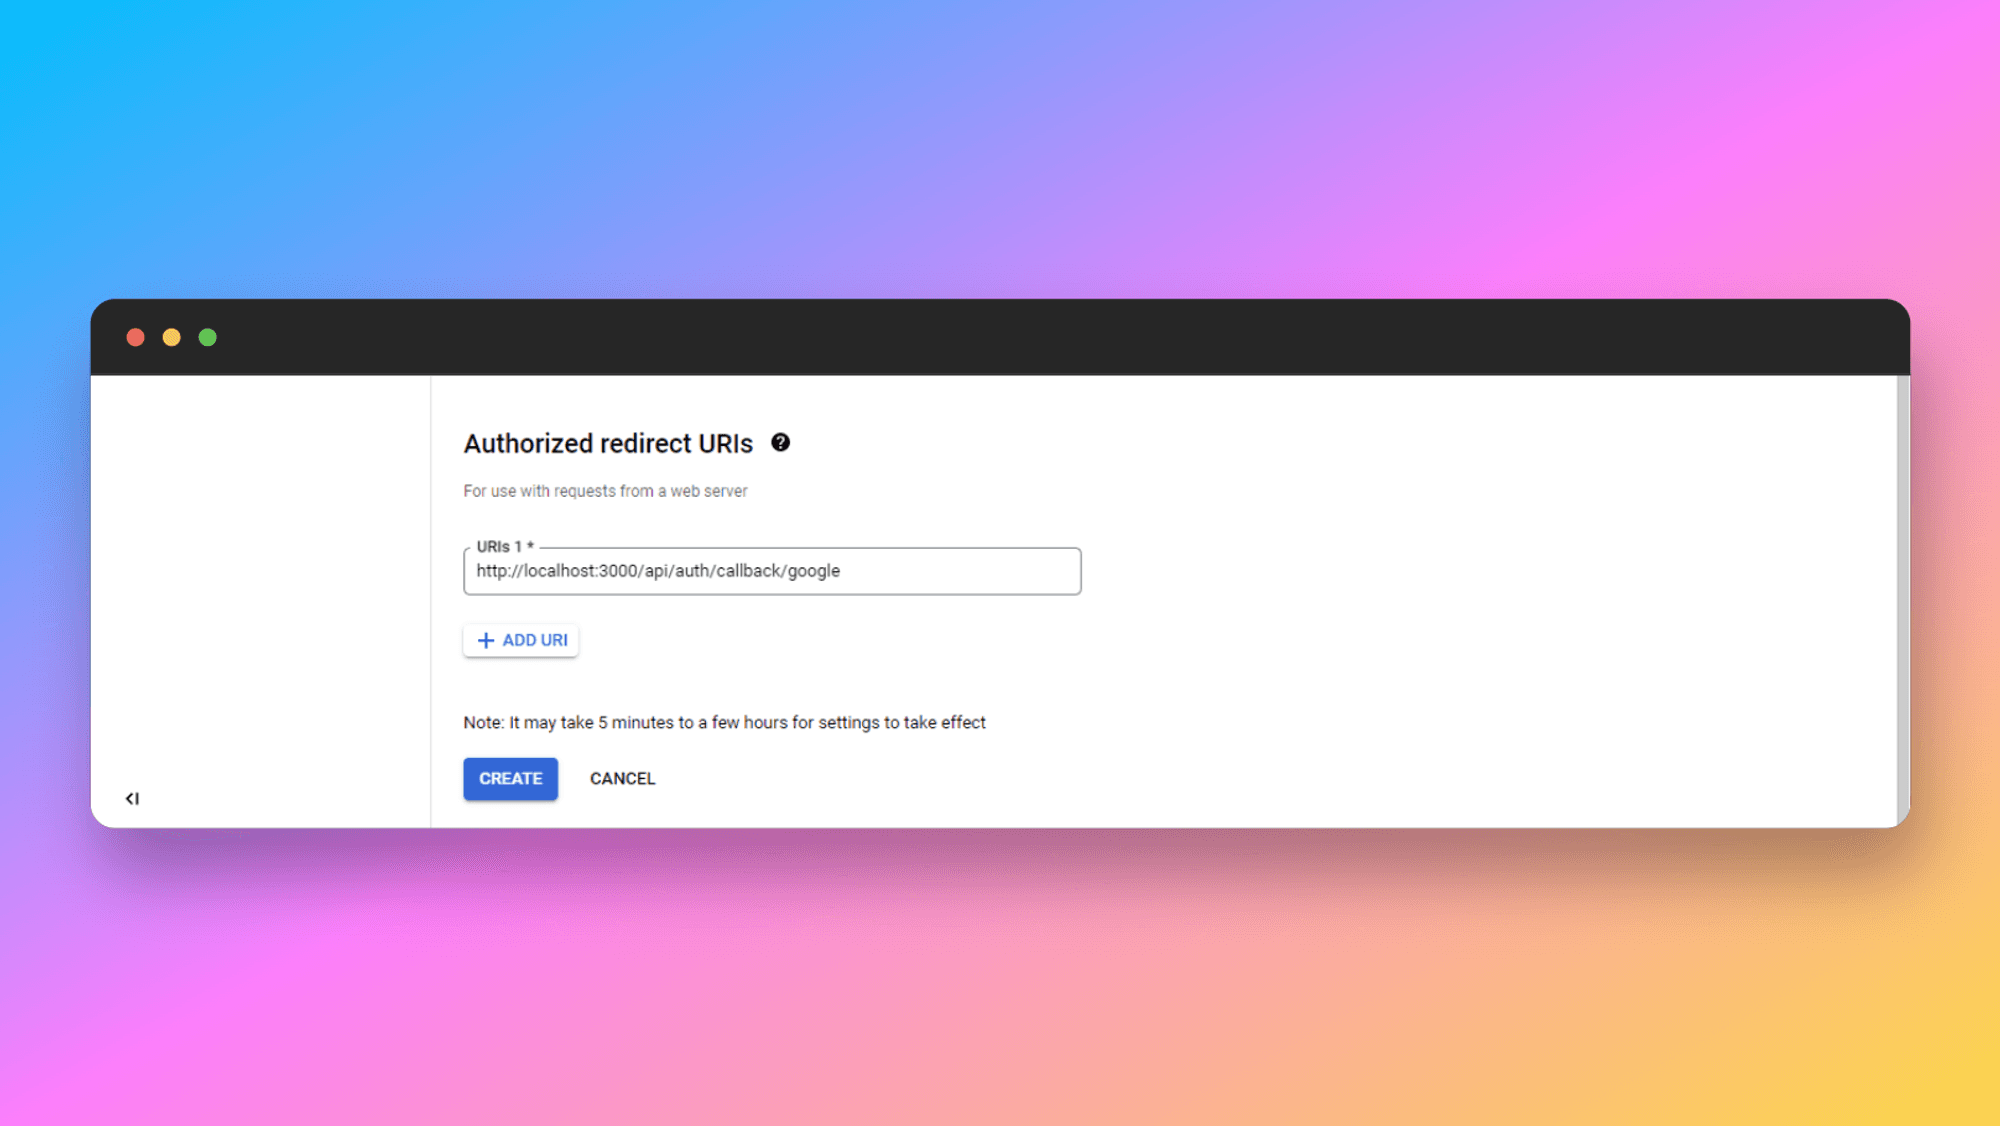
- Authorized Redirects URI: After that, you have to provide the redirects URI. For the Authorized redirects URI you have to include your domain with the callback path included in the end.
For production: https://YOUR_DOMAIN/api/auth/callback/google
For development: http://localhost:3000/api/auth/callback/google
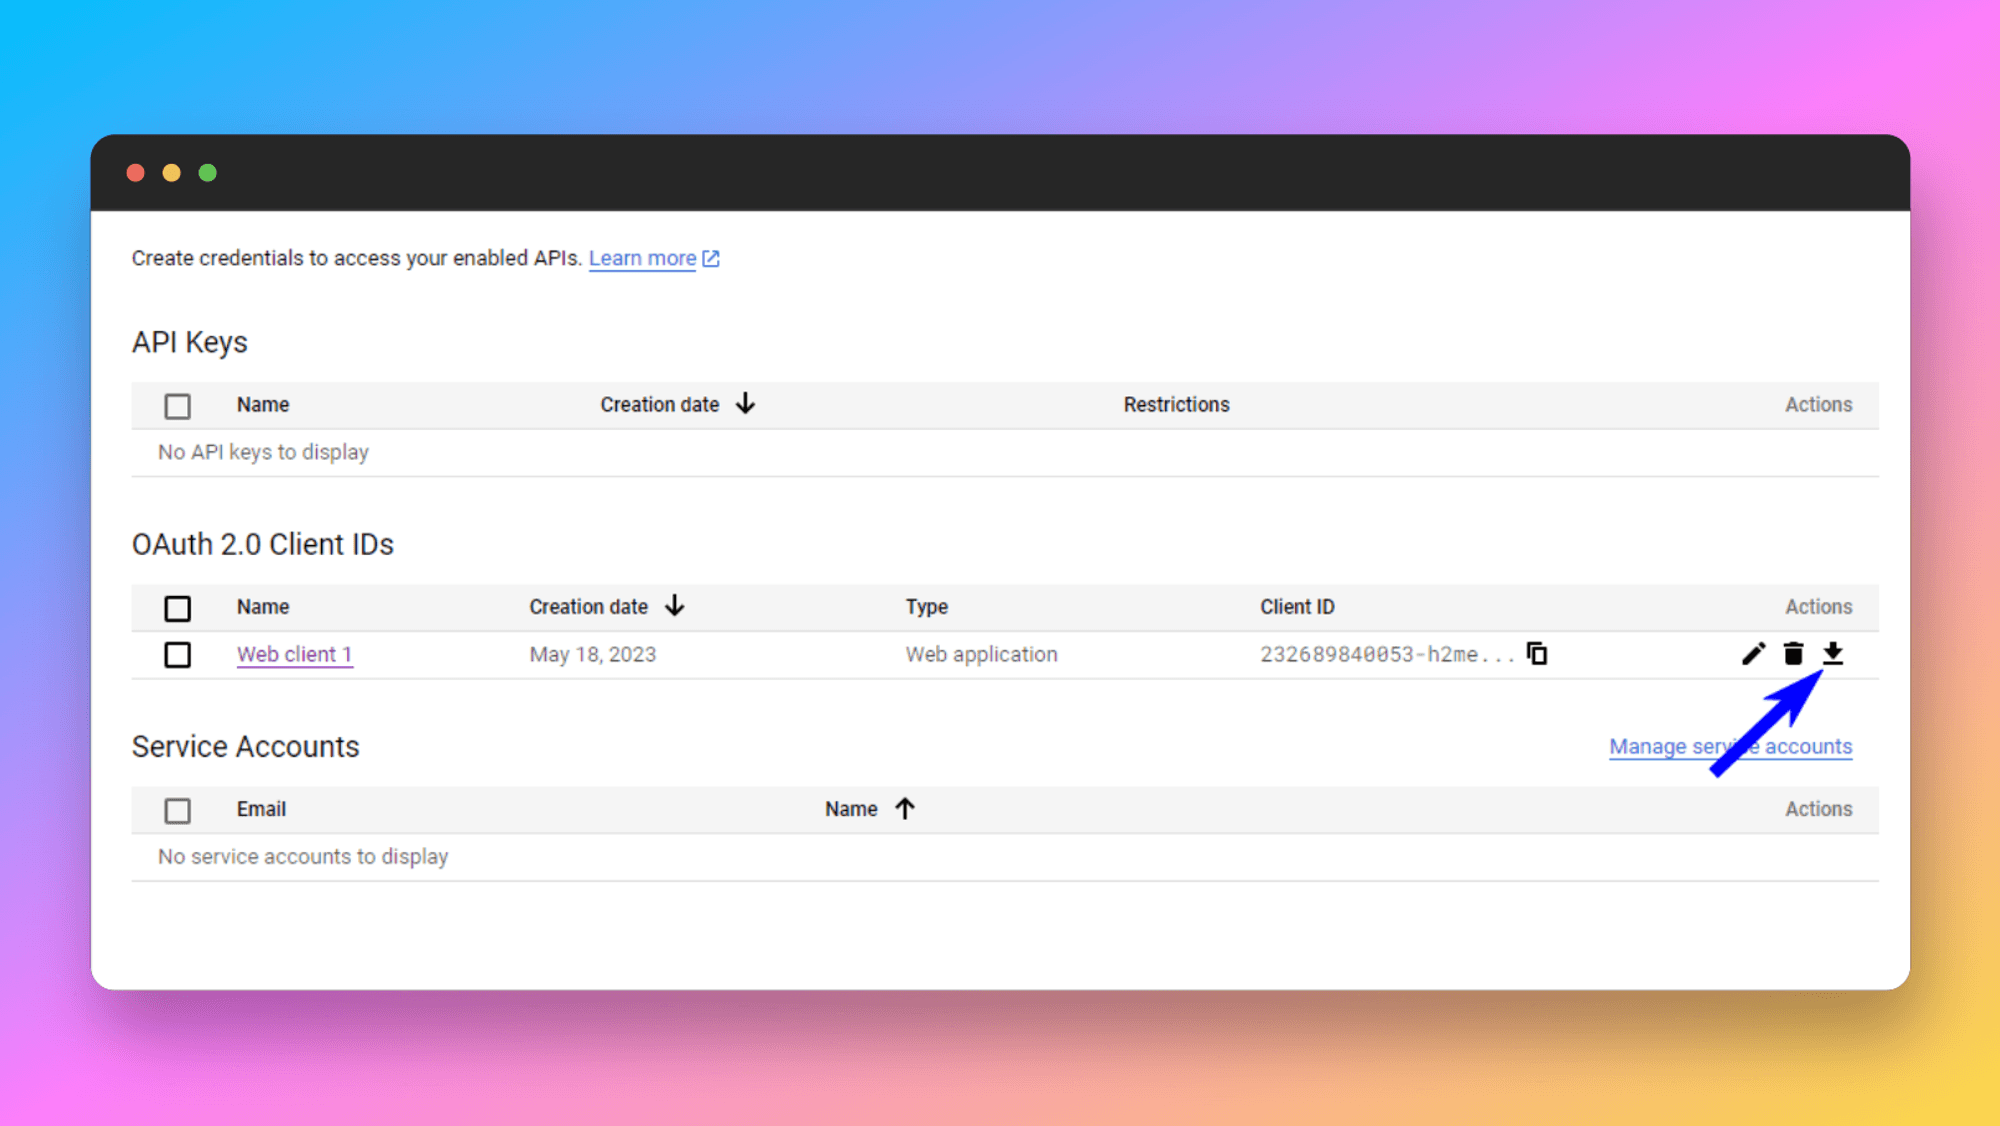
- Obtain Client ID and Secret: Once the setup is done, click on the Create button. If everything is done perfectly, you’ll be redirected to this page.
Here you can see the Client ID and Client Secret, go ahead and copy-paste them to the .env file
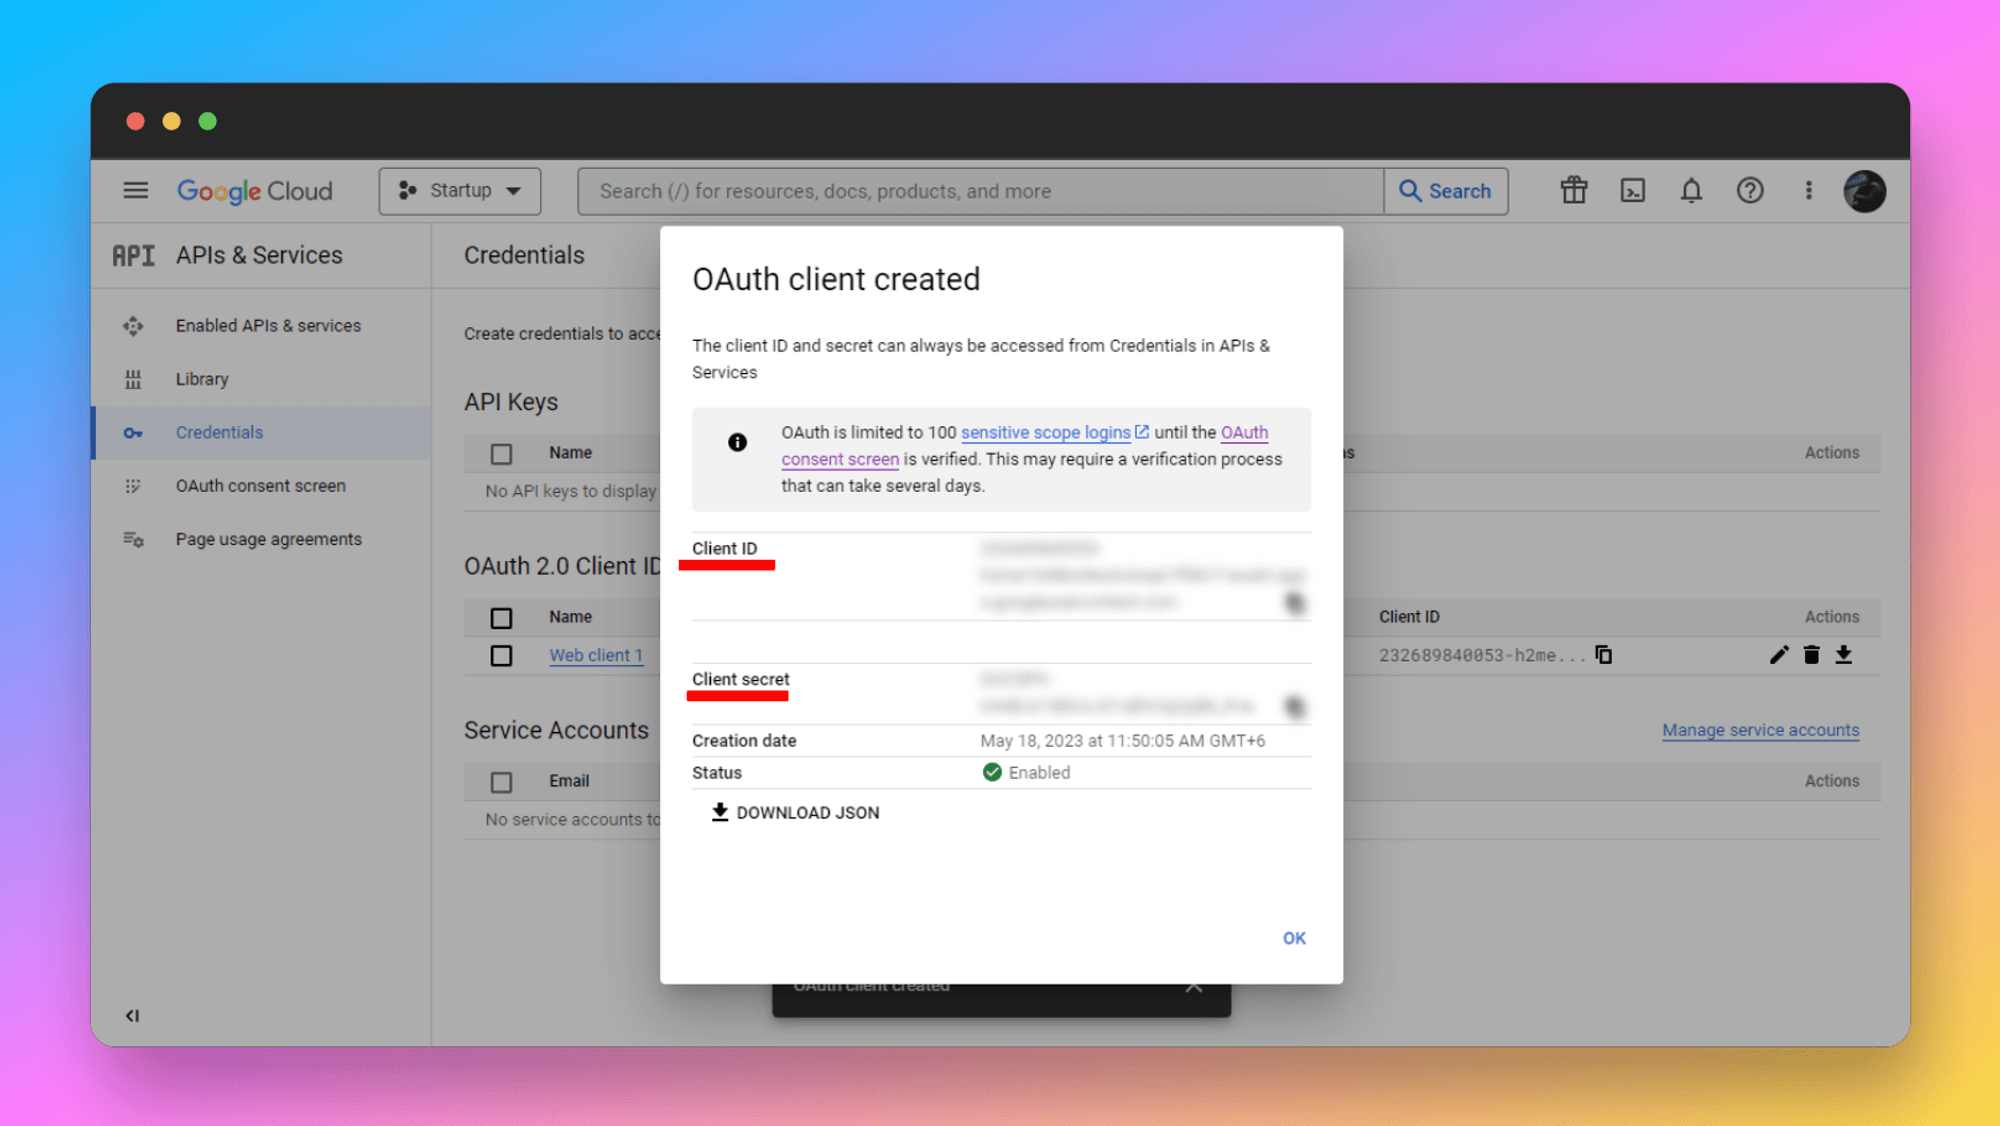
GOOGLE_CLIENT_ID="Your Google Client ID"
GOOGLE_CLIENT_SECRET="Your Google Client Secret"
If you’ve accidentally closed the tab, click on this button to open it again.
GitHub Auth
SaaSBold also comes with GitHub authentication, let’s go ahead and see how to integrate GitHub authentication.
Steps to Integrate GitHub Authentication:
To integrate Github, we will need the GitHub Client ID and Secret; follow the steps below to generate the keys.
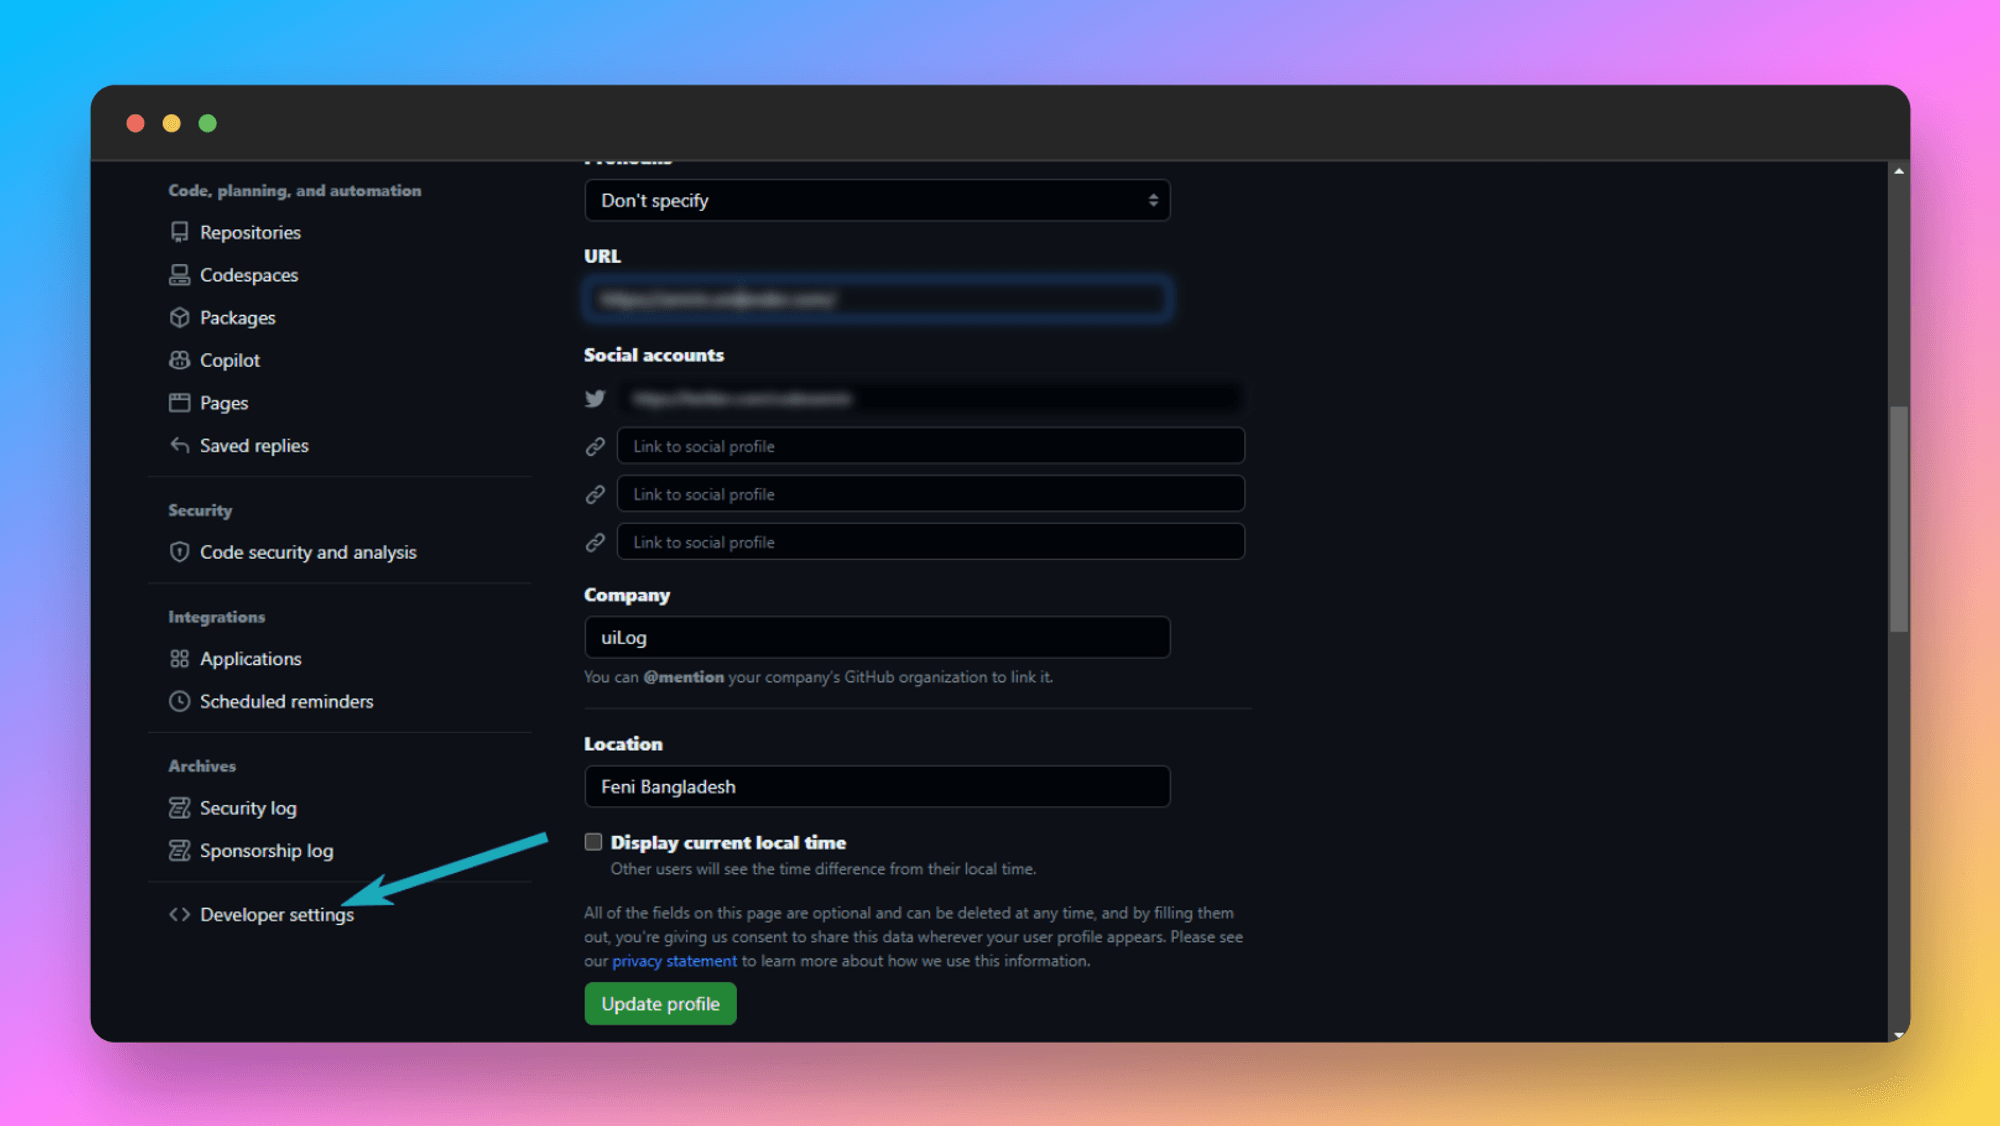
- Register a New OAuth Application: Go to your GitHub account then navigate to the Developer Settings .
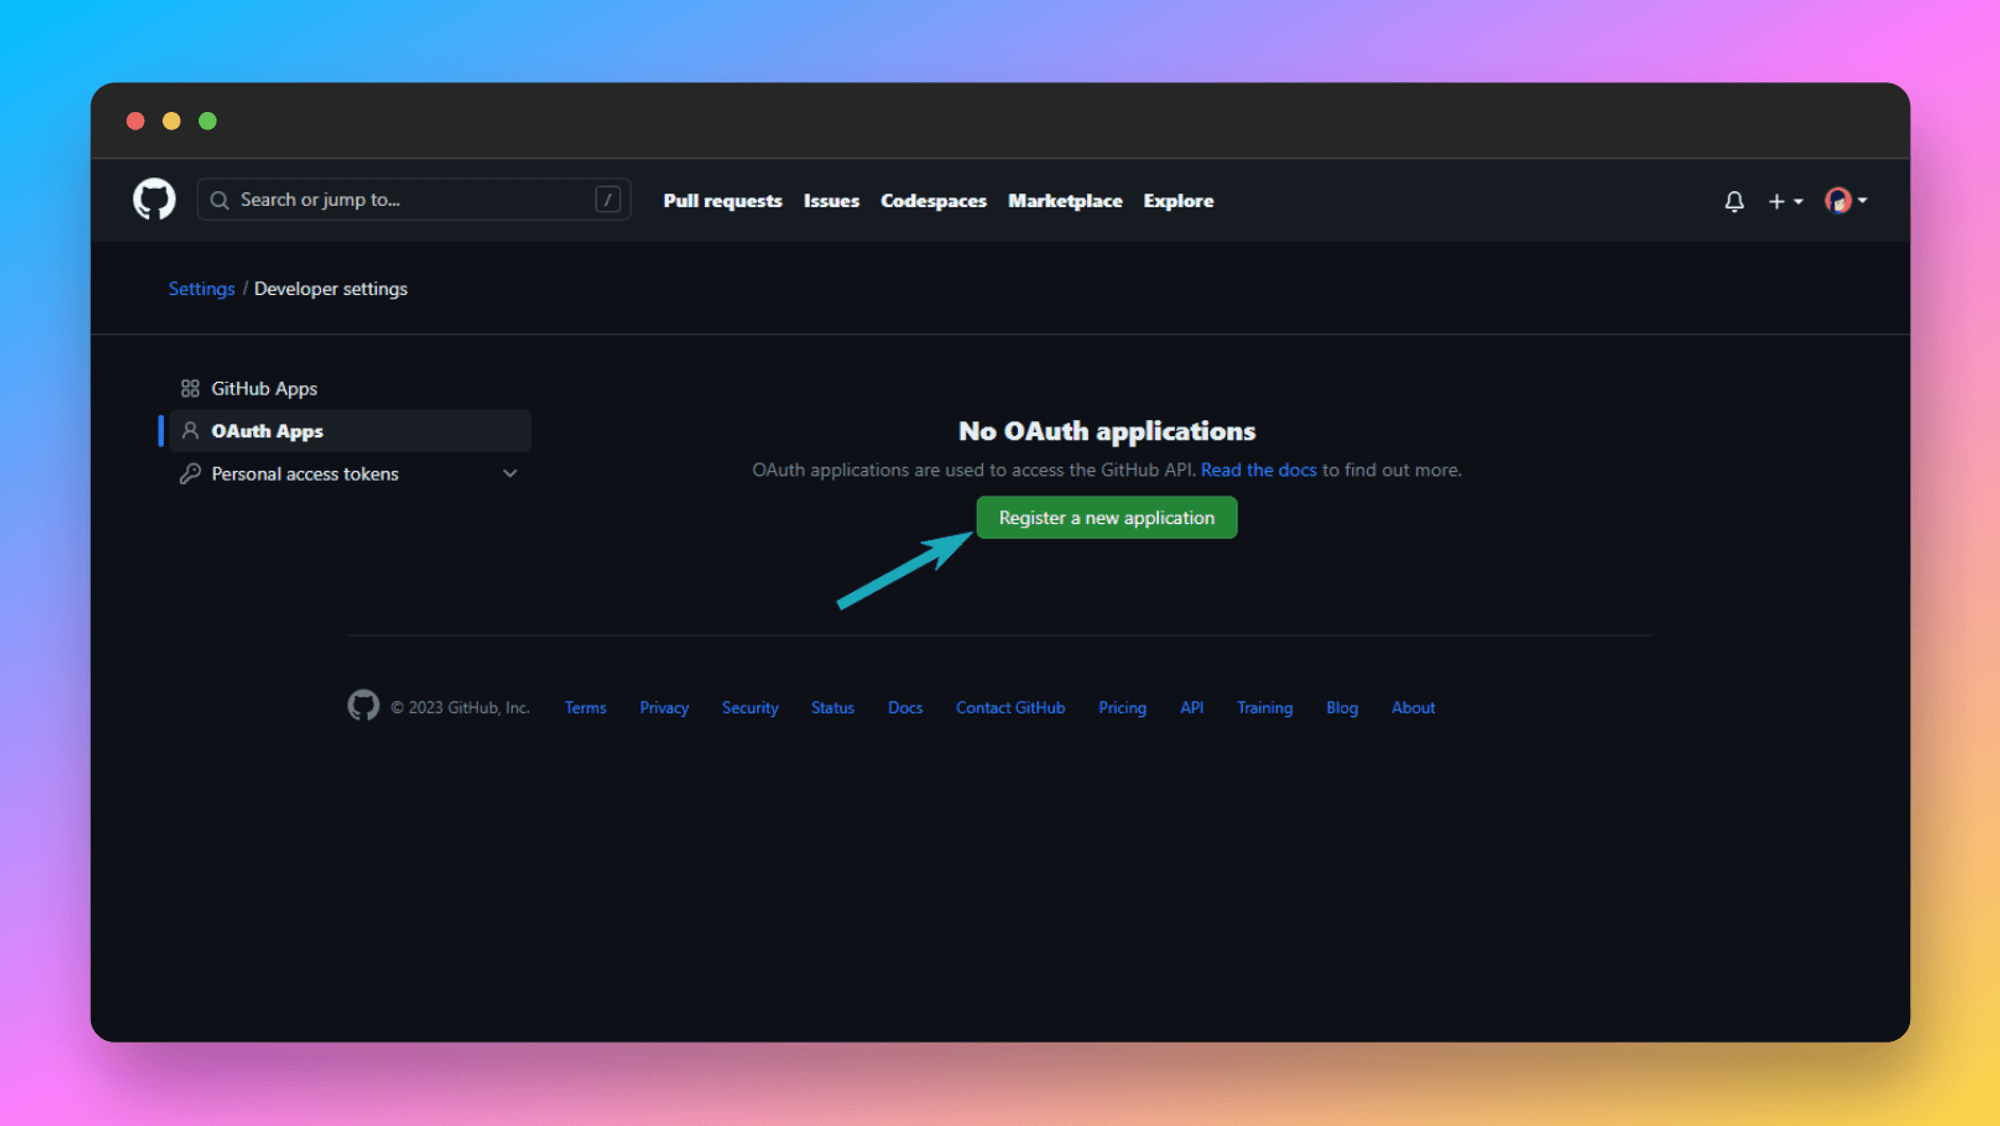
- Click on the 0Auth App button then click on the Register a new Application or “New OAuth App” button to register an Application.
- Provide all necessary information and set the Authorization Callback URL for production.
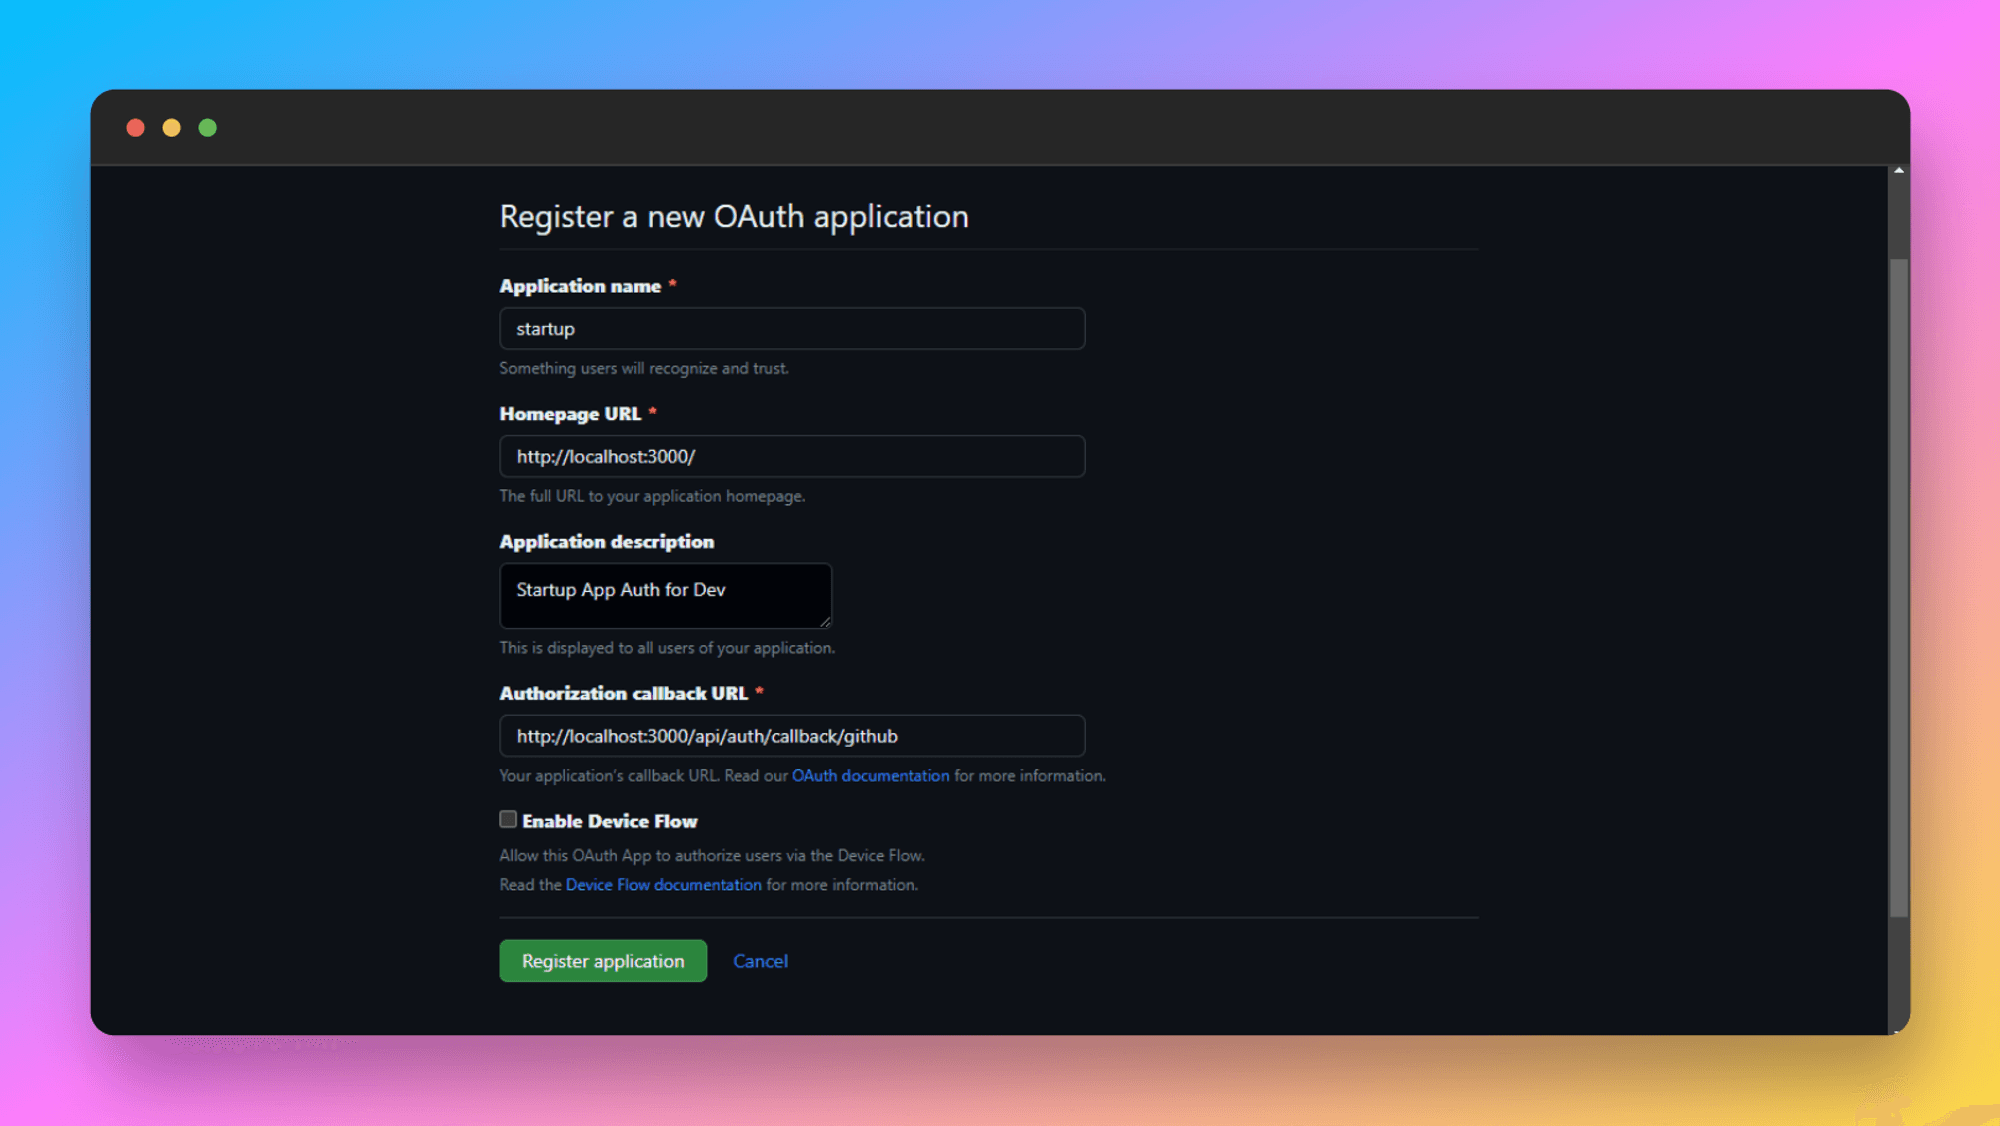
Important
Change the Authorization Callback URL for production. Replacehttp://localhost:3000with your website’s URL.
- Generate Client Secret: Click on the Generate a new client secret button to generate the Secret.
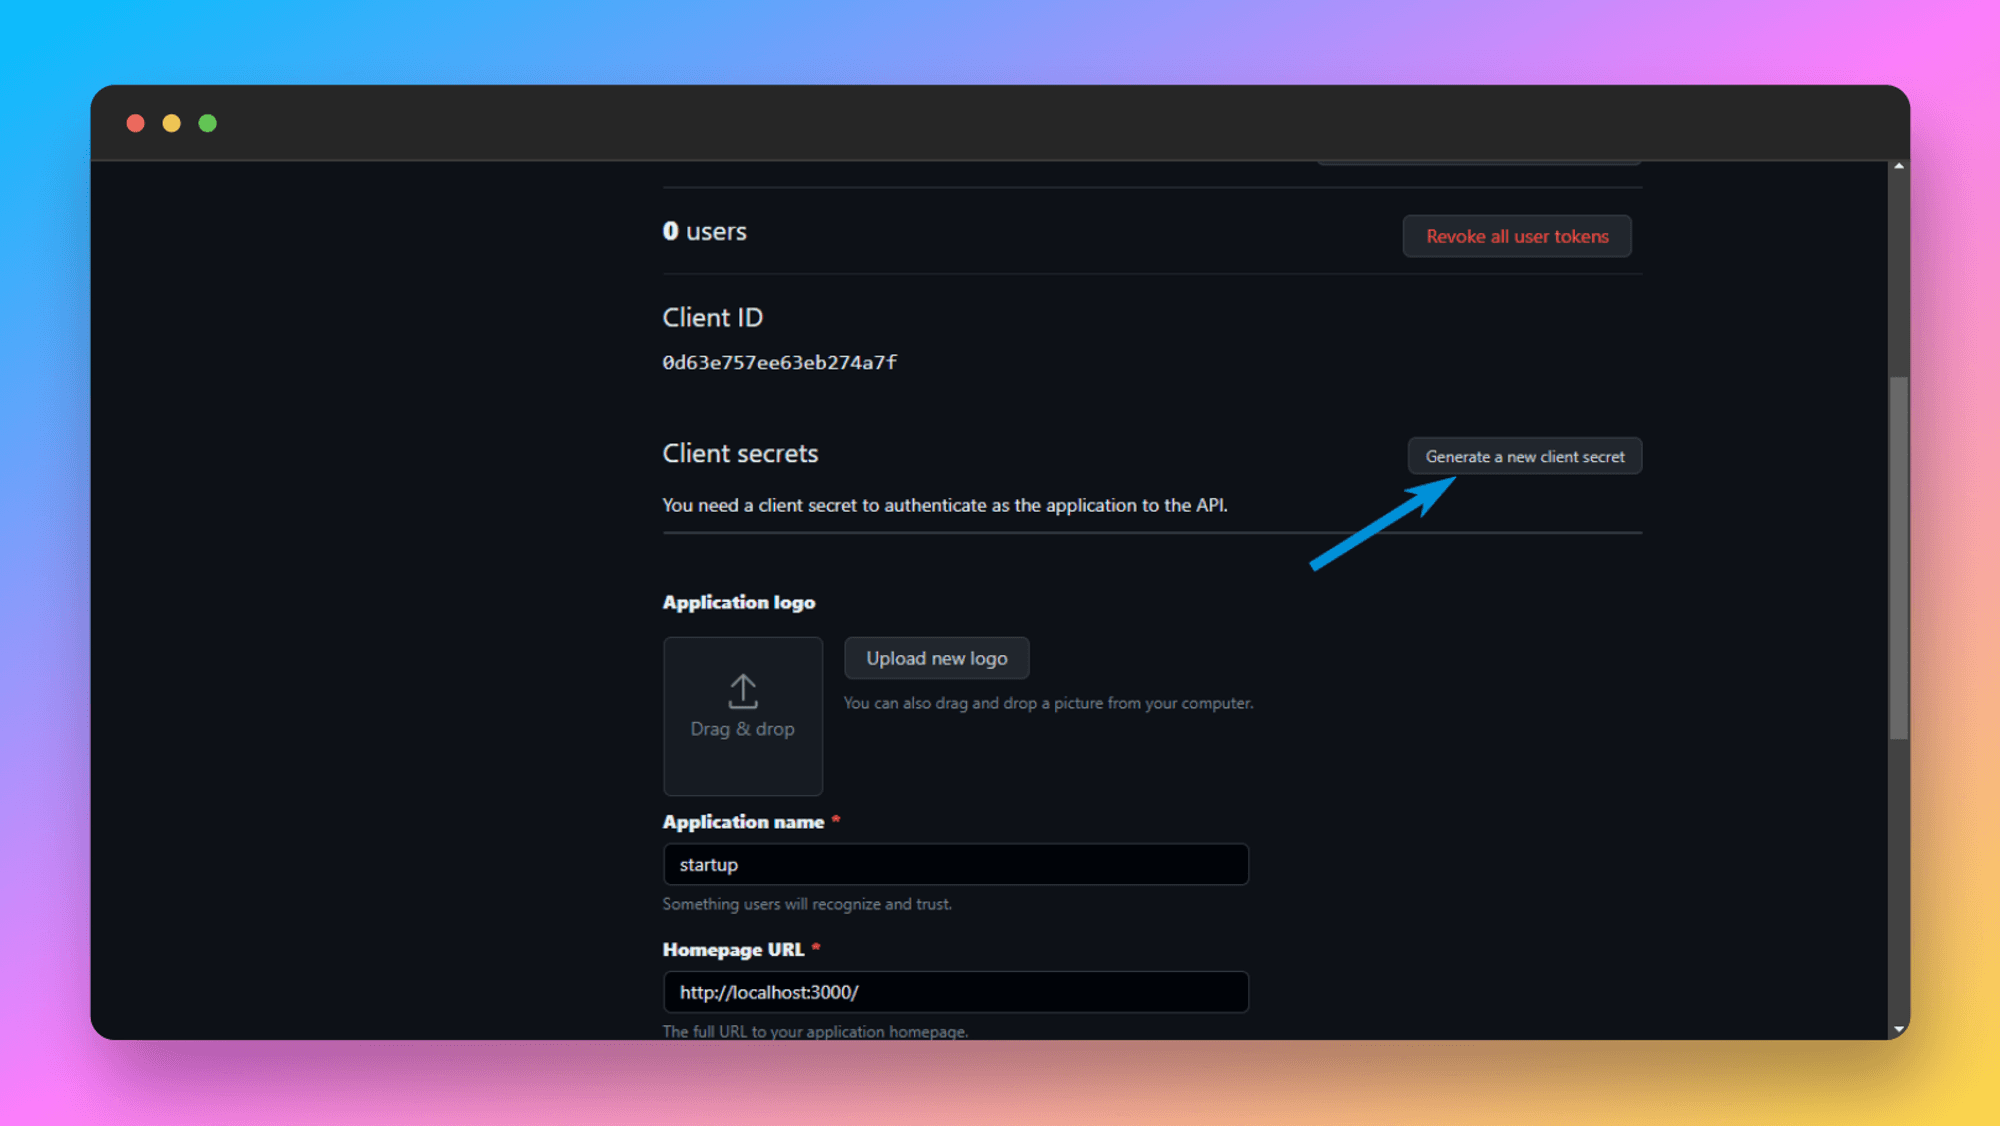
- Update Environment Variables: Now Copy the Client ID and Client Secret from here. And then update it in the .env file.
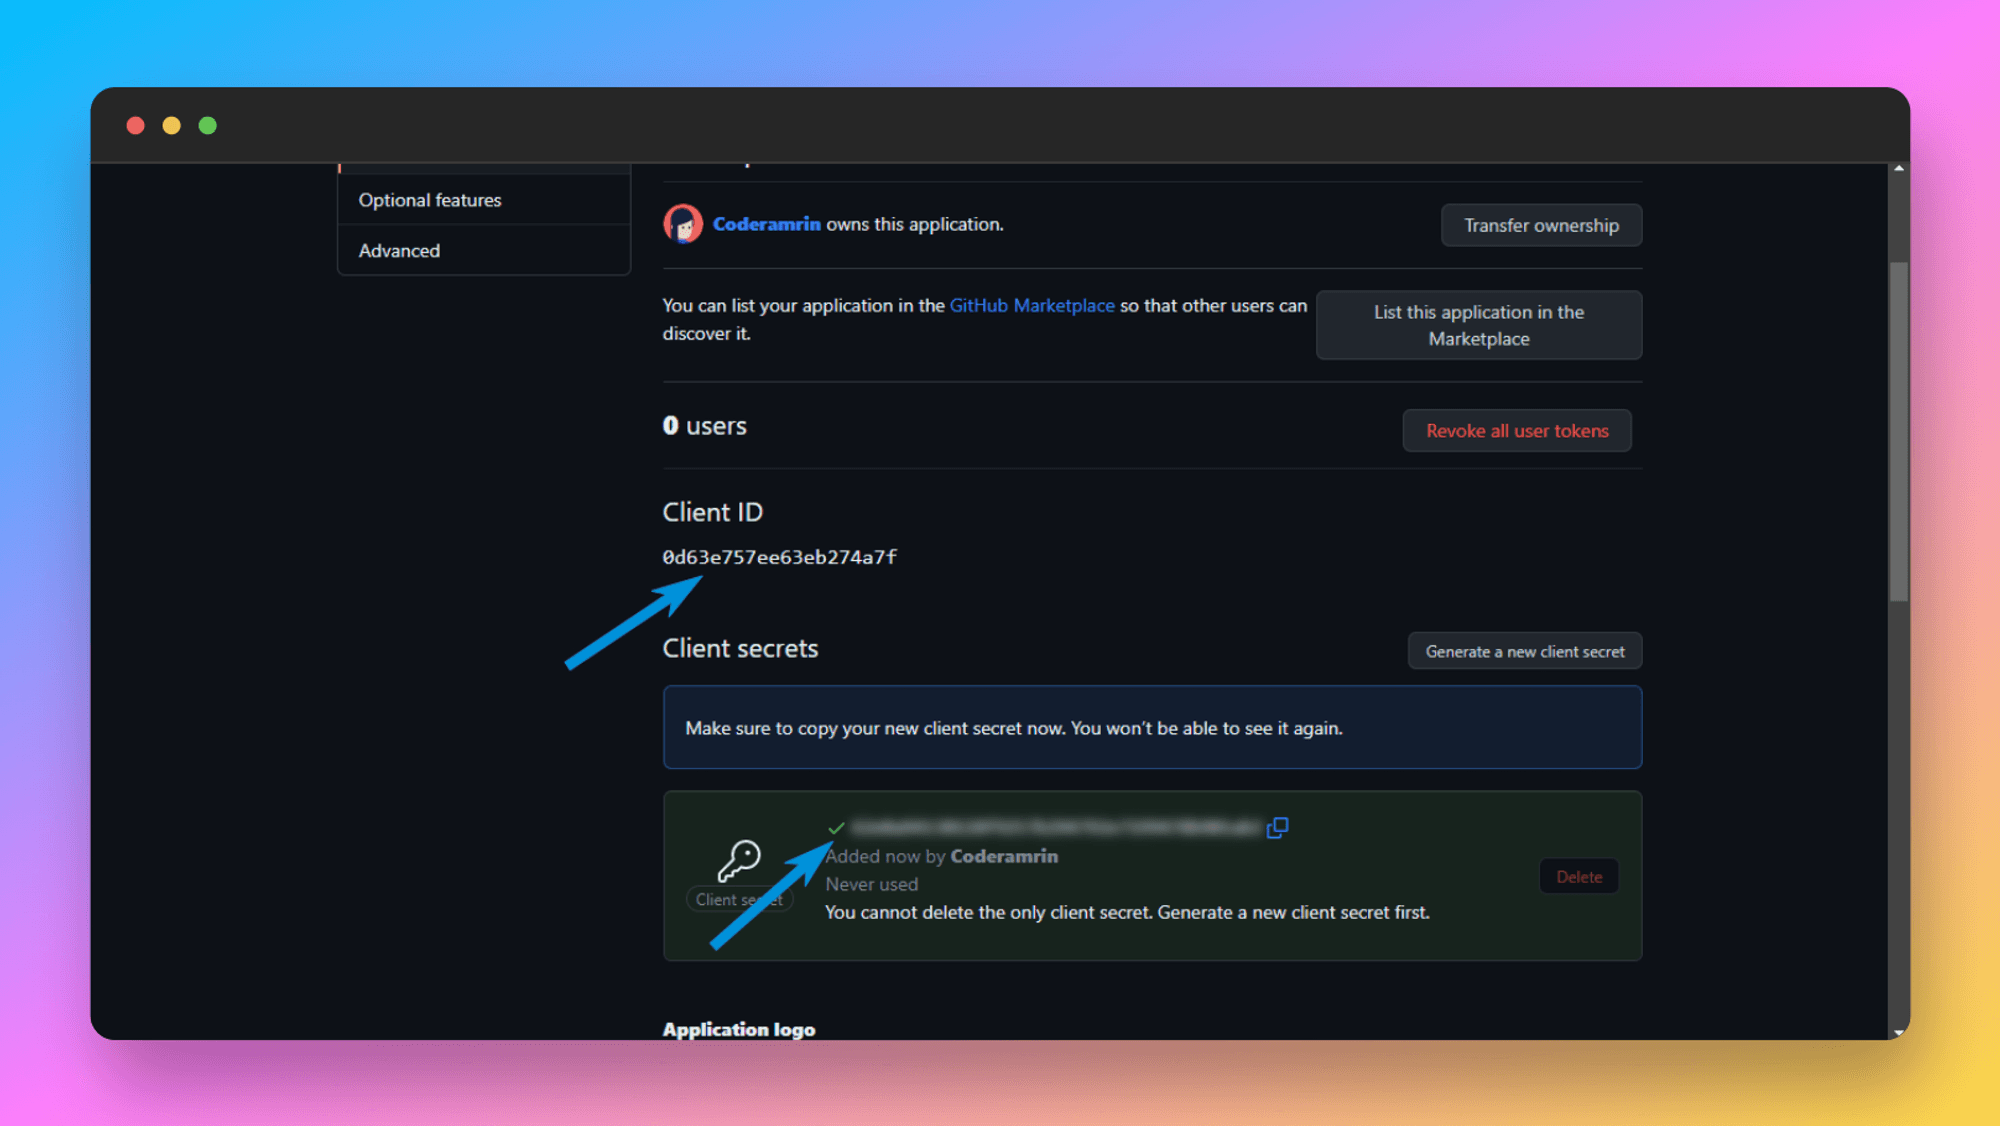
GITHUB_CLIENT_ID=YOUR_GITHUB_CLIENT_ID
GITHUB_CLIENT_SECRET=YOUR_GITHUB_CLIENT_SECRET
We are done with GitHub and Google authentications; now, let’s look at how we can integrate Magic Link Auth.
Magic Link
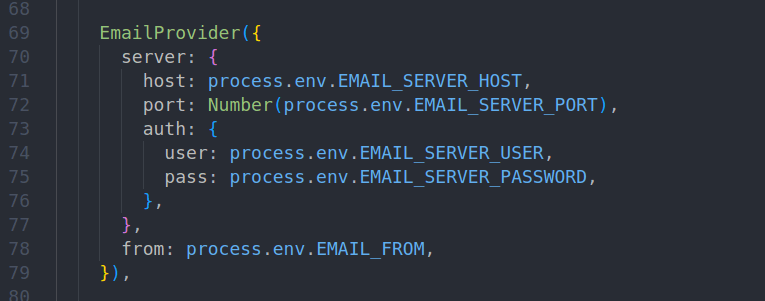
You need SMTP credentials to enable Magic Link authentication. To obtain SMTP credentials, check out the Email guide to see how to get SMTP credentials.
Tips
- User-Friendly Design: Ensure that the authentication pages are intuitive and easy to navigate.
- Clear Instructions: Provide instructions and error messages to guide users through the login and signup processes.
- Testing: Thoroughly test each authentication method in both development and production environments.
By following these steps and tips, you can effectively integrate authentication methods into the SaaSBold boilerplate, enhancing the user experience and ensuring secure access to your application.